
Add document content
When you first add a new document to Toolbox, you've only created a place for your document to go.
The next step is to add the content of your controlled document.
First go to the 'DRAFT' tab and then look down the page to find the 'Content' tab, which holds the document content.

You can add different kinds of content using the buttons:

Either upload a file attachment as the controlled document, or create the document within Toolbox. Each approach has different advantages:
- If you create the document within Toolbox, it's easily accessible to your users since they don't need to download and open a file. The document content is just like a webpage - click on the link to open the page, and the document is right there. When you print a document created in Toolbox, it will show your logo up in the header. If your company changes its logo, you'll only need to update it in one place to have all your documents showing the new logo.
- Upload the document as a file attachment if you want more control over the formatting or have a lot of existing documents you want to get into Toolbox quickly. In this case, your users will need to download the file and open it in order to see the document content. Note that the file can be anything you want to control - a Word, Excel, Visio, Powerpoint, video, audio, even a machine configuration file. Toolbox doesn't interfere with the uploaded file at all, so whatever you put into Toolbox will come back out again the same.
To build a document within Toolbox
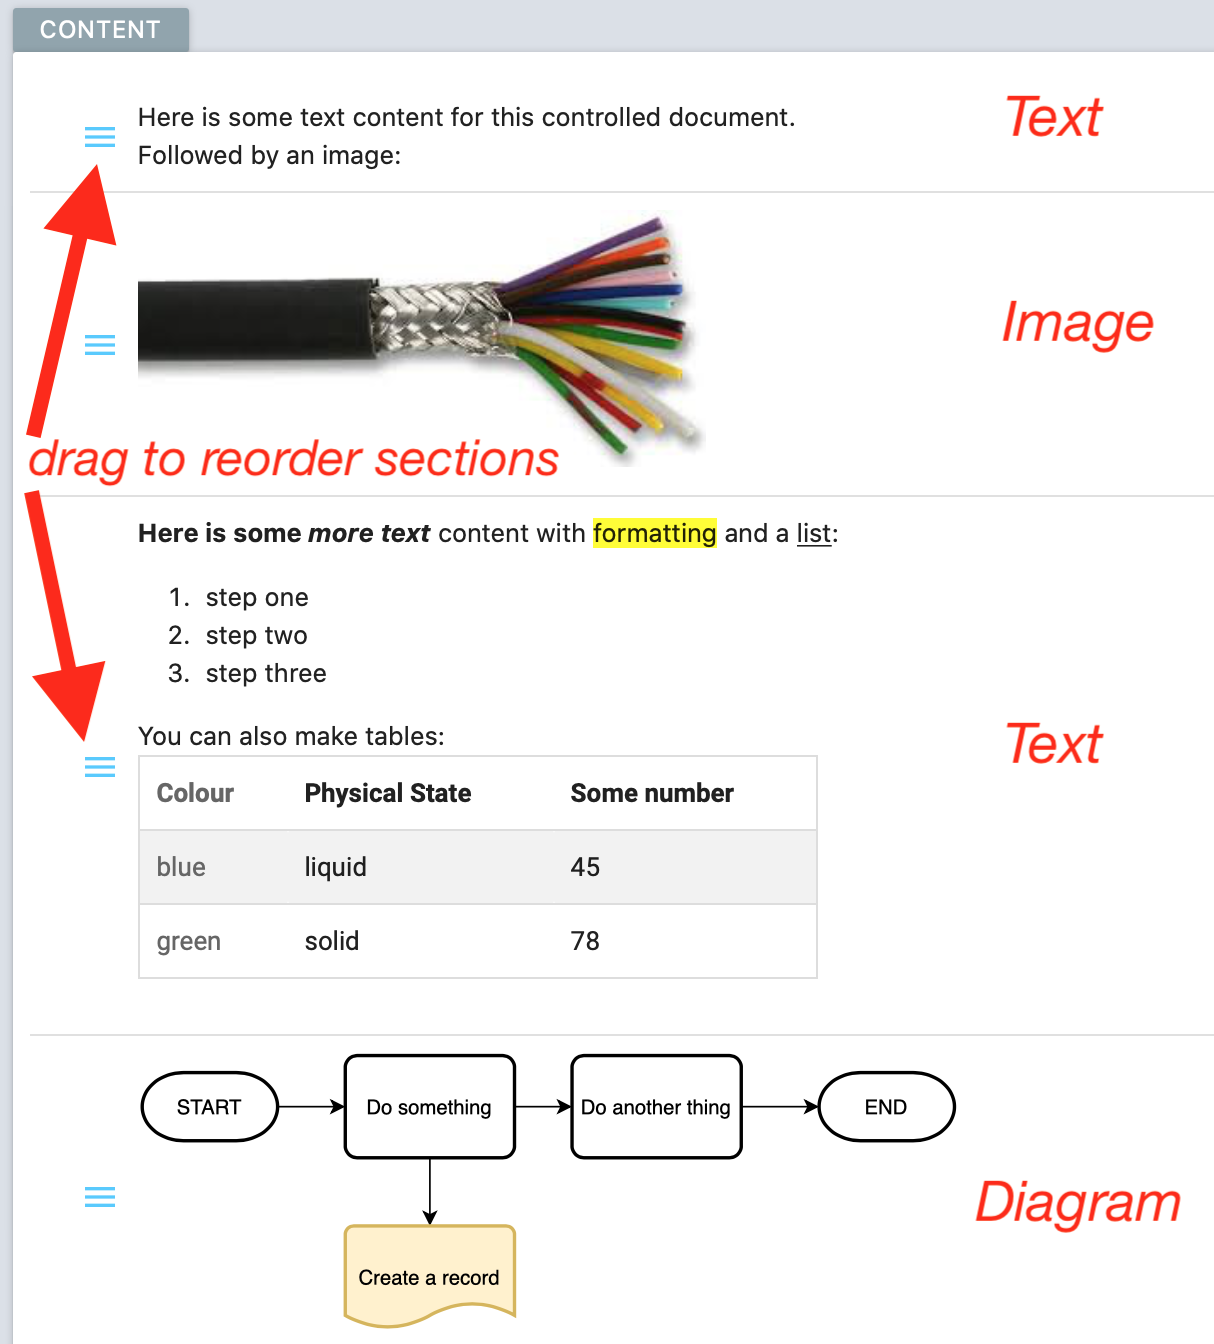
Click on the relevant button to add of the following sections to your document:
TEXT - a section of text
IMAGE - upload an image
DIAGRAM - draw a flowchart or other diagram using embedded Draw.io
Reorder the sections by clicking and dragging on the 'handles' to the left of each section. Click on the corresponding pencil icon to the right to edit that section, or the trash can to delete a section.
You can add as many of these as you wish.
To upload a file attachment
Under the document content section, there are two file buttons to choose from. You can only have one of each.
FILE (WORKING) - a master file to protect and control, but not release (e.g. docx)
FILE (RELEASED) - the file that you do want to be released (e.g. pdf)
Why two options?
Some companies don't want to release a docx file since it might be edited after being downloaded. In this case, store the master editable copy under (WORKING) and put a pdf version in (RELEASED). System users will only be able to access the pdf version when the document is approved and released.
If this isn't a problem, upload your file under (RELEASED) and don't add anything for FILE (WORKING).
Why can I only have one file to release?
If you have multiple files under the one document listing, it's going to get very tricky to manage the revision information. What happens when one file gets updated and the others don't?
For a collection of documents, manage them separately and use the 'Related' tab to link them together.
Next: Document Workflow - submit for review, and release a document